

Luna Tech | 使用 GitHub Action 自动部署博客到远程服务器

1. 背景
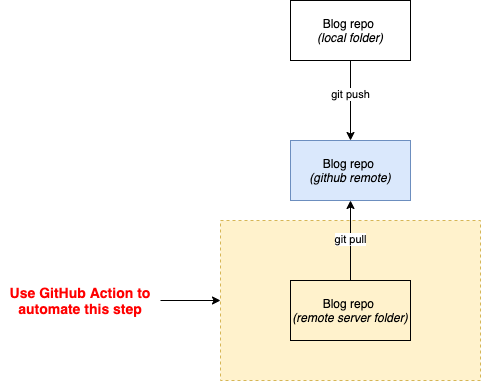
我是用一个 GitHub repo 来管理博客的 public folder,在这里先简单介绍一下我的博客管理及推送流程:
- 写博客;
- git push public folder 到 remote repo
- 然后我要 ssh 登录到云服务器,把最新的 public repo pull 下来
今天这篇文章的目的是把第三步直接通过 GitHub Action 来完成。
现在我的工作流是这样的:
- 写博客
- git push 到 remote repo
没有第三步了,因为 GitHub Action 自动部署,我不需要登录云服务器手动 pull repo。
查资料
References:
https://frostming.com/2020/04-26/github-actions-deploy 我按照这个教程做出现了 permission denied 的问题。
https://juejin.im/post/5e1c23af6fb9a02ffd6eb495 这篇多了个步骤,要把 public key 加到 deploy key 里面,尝试了还是没用= =
https://juejin.im/post/5e5265026fb9a07ccd518610 总算找到一个和我一样遇到 ssh key 问题的人,根据文中的步骤解决了 permission 问题。
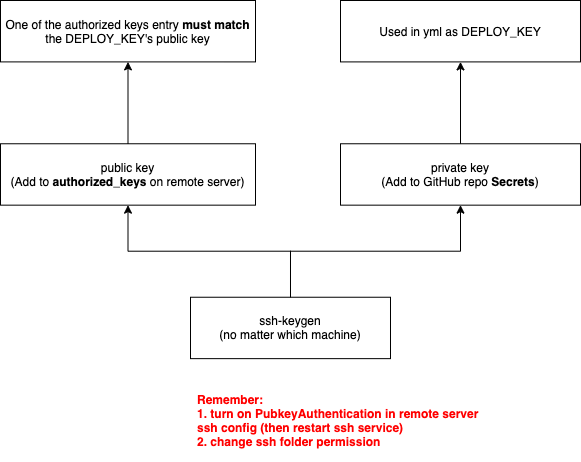
我总结的流程图
重点:
- remote server 的 authorized_keys 里面必须有一个【与 GitHub secret private key 相匹配的】public key
- 必须把 remote server 的 ssh config 设置正确(然后重启 ssh service)
- 修改 ssh folder permission(为了安全)
2. 步骤详解 (SSH 部分)
1. 创建一个新的 ssh key pair(任意一台机器都行)
不要设置 passphrase 哦!!!
|
|
2. 把 public key 加入到 authorized_keys 里面
如果不加进去的话,会遇到 Permission issue。
|
|
3. 修改 ssh folder 权限
700:只有 owner 拥有读、写、执行权限。
|
|
4. 设置 ssh 配置文件,打开密钥登录功能
|
|
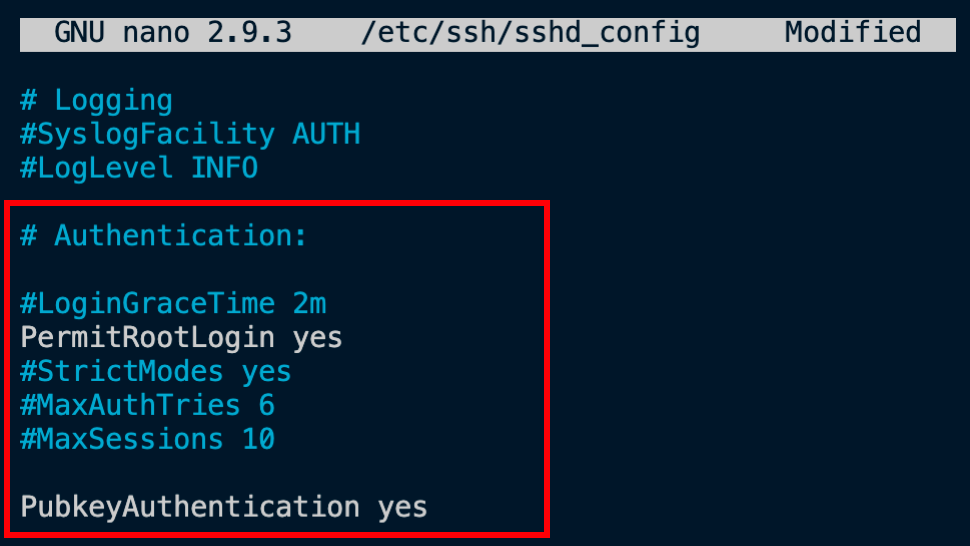
我参考的文章让我设置:
|
|
但是我查了下这两者的区别,发现:
- RSAAuthentication is for SSHv1 keys. PubkeyAuthentication is for SSHv2 keys.
也就是说,其实只要设置 PubkeyAuthentication 就行了。
2017 年的这个讨论区 thread里面明确指出 RSAAuthentication 已经不支持了,让大家更换为 PubkeyAuthentication。
5. 重启 ssh 服务
|
|
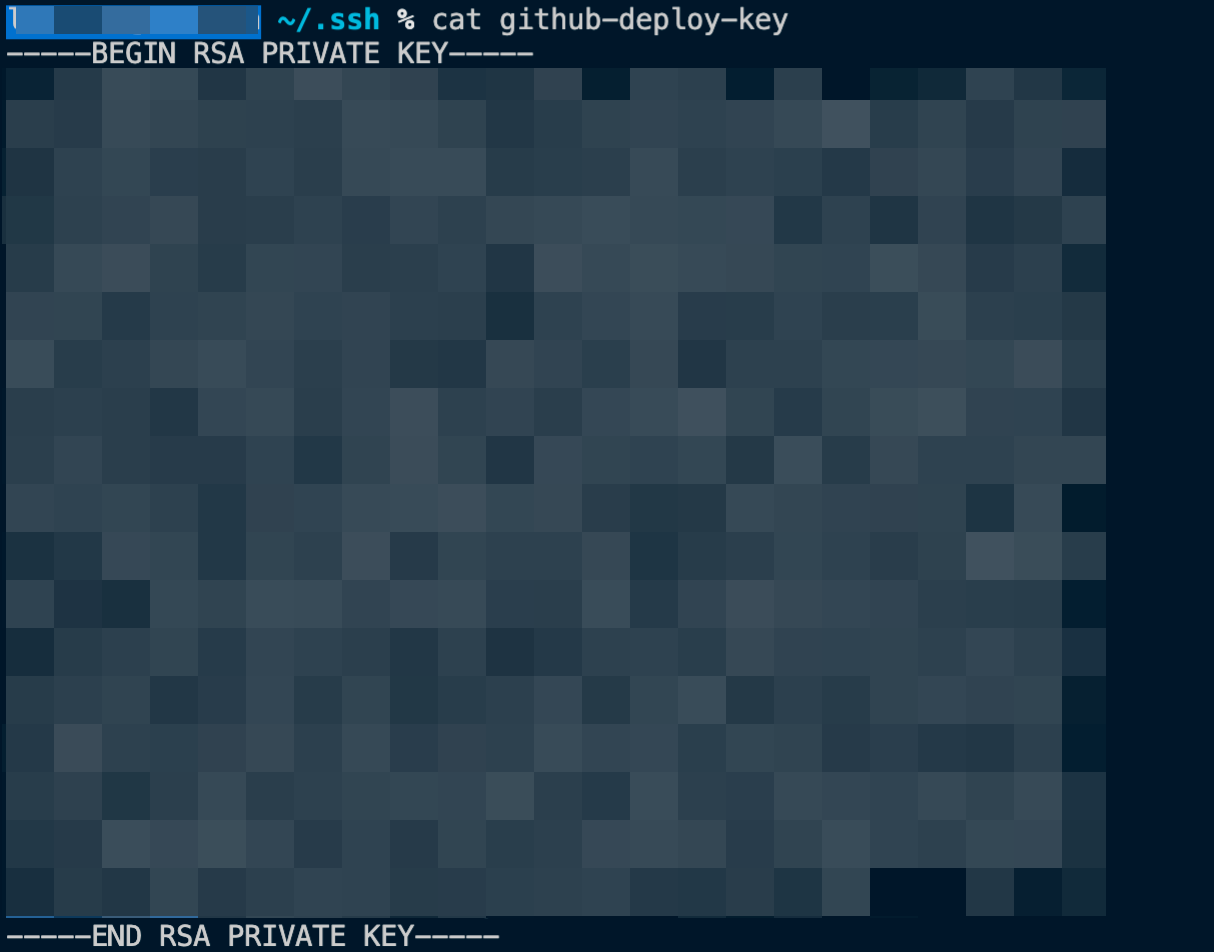
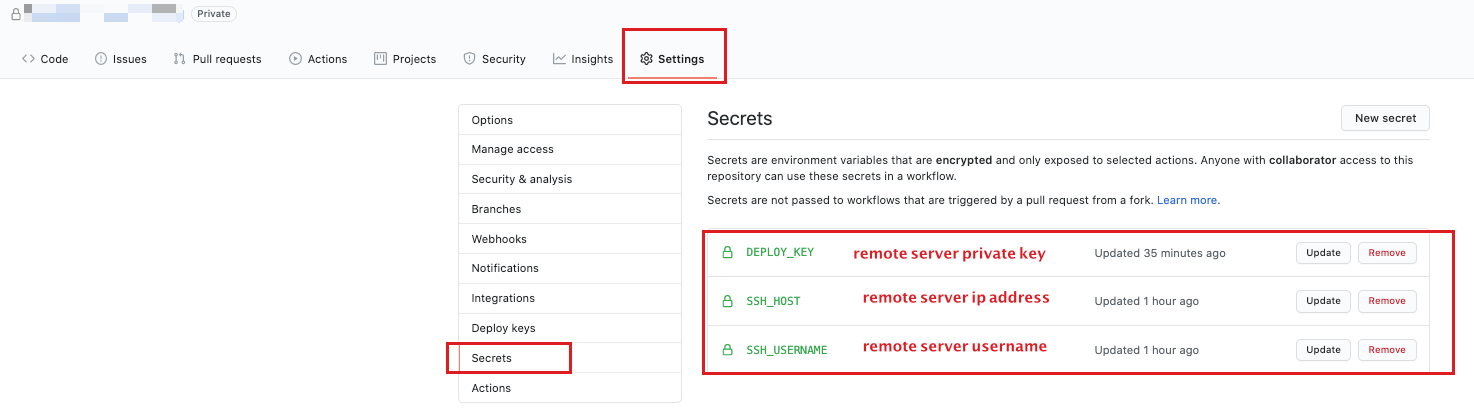
6. 复制 private key 到 GitHub repo -> setttings -> secrets
注意复制 private key 的时候要把全部的内容都复制进去!包括–begin 和–end 的部分。
|
|
也可以顺便设置 ssh_host 和 ssh_username.
4. 步骤详解(GitHub Action 部分)
1. 在 repo 的根目录创建 .github/workflows/xx.yml 文件
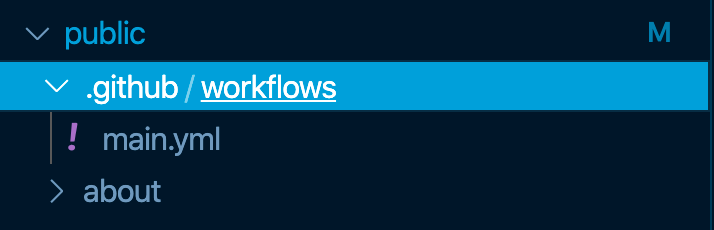
这个 yml 文件就是用来配置 GitHub Action 的,下面是我参考的一个教程里面给的模板。
如果想更进一步了解 GitHub Action Workflow 文件的语法,可以参考这个链接。
|
|
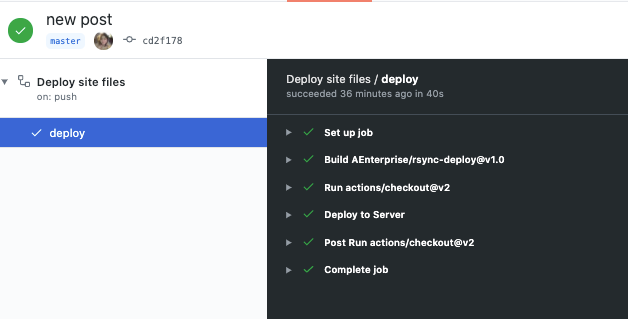
2. commit change 并且 push 到 remote repo
现在你可以点击 action,然后看到你设置的 workflow。
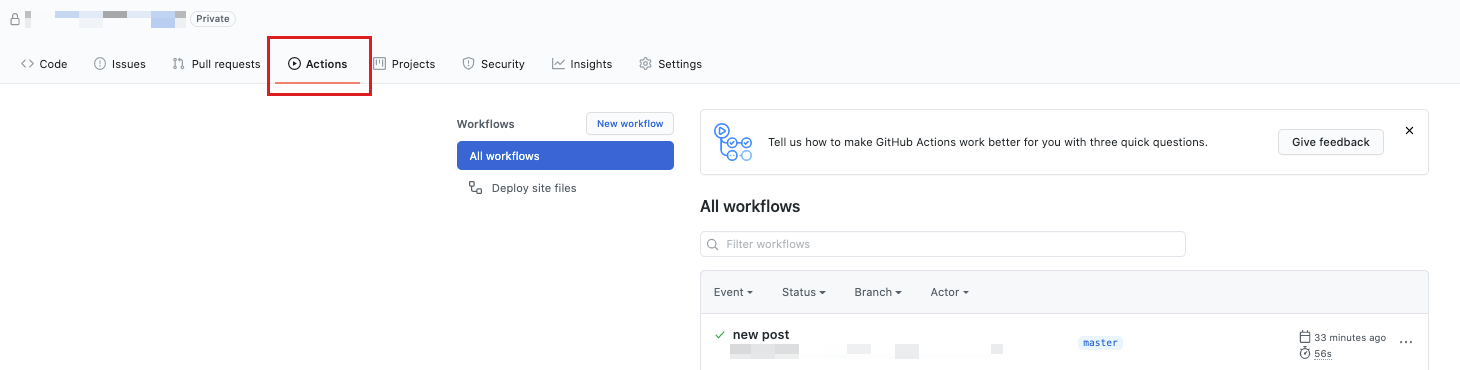
3. 每次 master branch 有新的 commit,这个 action 就会执行~
5. 结语
有了这个 Action,我就不用每次更新博客 repo 之后再 ssh 登录到服务器去 pull repo 了~
设置好这个工作流之后,又给自己未来更新博客省了不少时间 (^-^)V
如果读者们有类似的需求,不妨跟着我的教程做一遍。
PS: 我们这里把 private key 放在了 GitHub Repo 的 Secret 里面,可能会有安全隐患,如果大家有好的解决方案,欢迎一起讨论~
Talk to Luna
Support Luna